Clock 3D Screensaver released
February 7th, 2009It’s finally out! Go get it!
It’s finally out! Go get it!
I have updated gljakal’s ToDo to fix a nasty bug that occurred when you tried to create a new to-do list with the AdvancedStatus plugin disabled and the AutoBackup plugin enabled.
This was actually a kind of weird situation, since I always have both the plugins enabled all the time… Turns out that many ToDo users prefer to disable AdvancedStatus while leaving the backup feature enabled….
Anyway, thanks to the kind people who sent the error report! (yes, I do actually read them!)
Also, if any of you happen to send an error report, please do include your email address. This way I can contact you once the problem is resolved. (And you won’t say “this program sucks!” 🙂 )
You created a database for your application. You designed the perfect table structure, added some smart views and created the coolest stored procedures that make your application work like magic.
But now, you want to back them up together with the code of your program, using subversion or CVS. Afterall, they are part of the application logic.
Better yet, you would like to automate the extraction procedure so that you only need to launch a batch file and your backup is done.
Gljakal’s Sql Exporter does just that: it extracts tables, views, stored procedures and triggers from your database and saves them as individual text files.
Used together with a source control software, you can have a precise idea of what changed between the various releases, just like you do with your applications’ source code.
You can do that with the interface version (shown in the picture) as well as with the command line version, that you can automate to run whenever you want.
Plus, it’s a free download!
Finally!
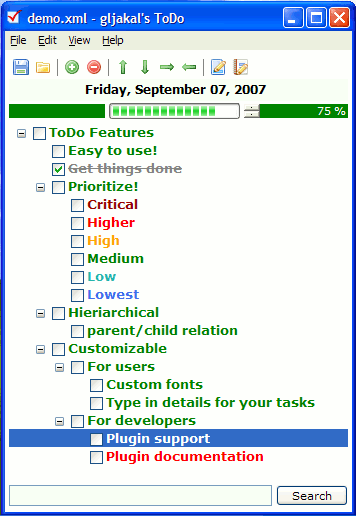
Today I am releasing the new, improved version of gljakal’s ToDo:

New version highlights:
Comments & critics are welcome!

More information at http://www.free-burma.org.
Lately I’ve been playing around with asp.net 2.0.
One of the new “features” of asp.net 2 is the introduction of Naming containers.
While using naming containers can be really useful when using databound controls and standard asp.net coding, they can be a real pain to work with when making extensive use of javascript.
This is because a control declared as
<asp:TextBox ID="TextBox1" runat="server" />
will be rendered as
<input name="ctl00$ContentPlaceHolder1$TextBox1" type="text"
    id="ctl00_ContentPlaceHolder1_TextBox1" />
on the client side, thus breaking any script referencing TextBox1 with, for example, getElementById(‘TextBox1’).
This behavior is built inside asp.net and is triggered not only when using databoud controls (where it would be necessary to prevent having multiple controls with the same name, for example inside a datagrid), but it is also triggered when using Master Pages, where having multiple controls with the same name is almost impossible.
So, how do we code around it?
Luke Foust, in his article Using JQuery to Make Asp.Net Play Nice with Asp.Net, explains a couple of client-side methods to let your javascripts select the right element in this situation. I recommend you to read it, because it contains some nice ideas and it also shows off some of the power of JQuery.
While these methods will work for most projects, they still present a couple of issues:
Let’s face it: the problem is really on the server, not on the client. Asp.net should not generate those horribly long IDs in the first place, unless we want to. So the best solution is a server-side hack.
How does asp.net know whether or not it should generate a unique id for our controls?
Every WebControl in asp.net exposes a property called (I’m sure you guessed it) NamingContainer, which tells asp.net what’s the parent control for our textboxes, labels and so on. All we have to do in our code is create a new class that will inherit the control we want to "sanitize" and hide that property from asp.net. Better said in code than in words:
using System;
using System.Data;
using System.Configuration;
using System.Web;
using System.Web.Security;
using System.Web.UI;
using System.Web.UI.WebControls;
using System.Web.UI.WebControls.WebParts;
using System.Web.UI.HtmlControls;

namespace wtd
{

    ///
    /// A TextBox control without ugly IDs
    ///
    public class TextBox : System.Web.UI.WebControls.TextBox
    {
        public override Control NamingContainer
        {
            get
            {
                return null;
            }
        }
    }

}
Then, in our pages, all we have to do is register our new set of controls, like this:
<%@ Register TagPrefix="wtd" Assembly="app_code"
     Namespace="wtd" %>
and replace every instance of the default asp controls with our own set of controls (a simple find&replace will do the trick), so
<asp:TextBox ID="TextBox1" runat="server"></asp:TextBox>
becomes:
<wtd:TextBox ID="TextBox1" runat="server"></wtd:TextBox>
And that’s it! Our textbox will now be rendered like this:
<input name="TextBox1" type="text" id="TextBox1" />
Not only this method won’t break your existing javascript, it also works nicely with your existing server-side code 🙂
Update
As pointed out by some of you in the comments, this method does not work in a traditional post-back scenario. See my new article for a possible solution to this problem.
As you may have noticed, the home page for this website just changed its dress!

But the news don’t just stop here.
Along with the new website, a new program is now available for download: it’s Irrlicht Font Maker, a program that will surely save hours to the many Irrlicht developers around the world.
The purpose of Irrlicht Font Maker is to generate 32bit, alpha mapped font textures ready to be used inside the Irrlicht Engine, a lighting fast open source 3d engine.
So, what do you think about the new design and new program? Let me know in the comments!
PS. For more information about the Irrlicht Engine, visit the source forge page and the author’s blog.
A lot of people asked me what’s the best way to launch Clock! as soon as they log into their computers.
In Windows, there is a very simple way to start any program right after you type your username and your password in the login screen. It’s called the “Startup Menu”.
The startup menu is simply a folder located under “All programs” in your Start menu. Every program located in this folder is automatically launched when you log into windows.
How do you add an item to the startup menu? The first thing to do is right-click it and choose Open. Now, probably you have a link to the program you would like to launch on your desktop. Just drag and drop your desktop icon inside the startup menu folder and there you have it: your favorite program will now start with windows!
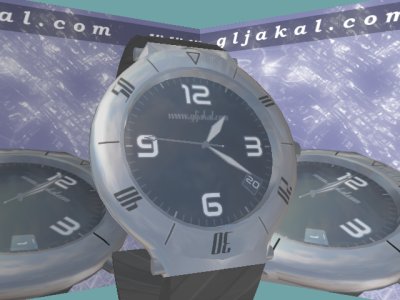
Progress on Clock3D screensaver is slow, but ongoing!
Here you can see the new “Fashion watch” skin:

More pictures to come!
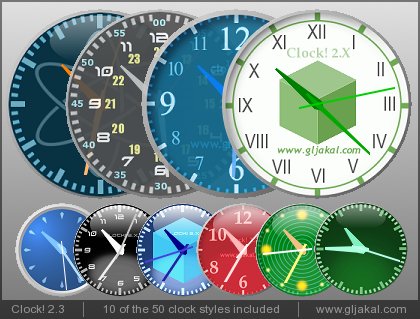
Finally, after way too much time, Clock has reached the stable version 2.3!

New features over the beta version:

Of course, all the cool features that were in the beta versions also made it to the new stable: